File Setup Instructions for InDesign
Step 1 – Product Dimensions
- InDesign templates are available here.
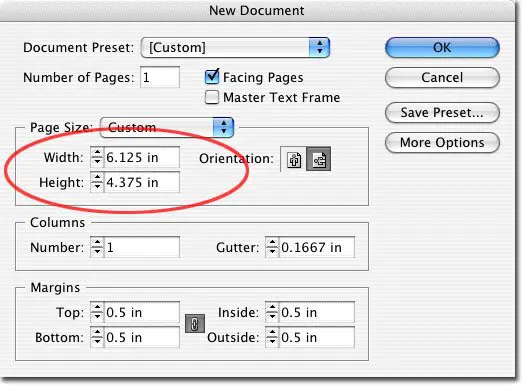
- Or if you want to start a new document, go to File -> New -> Document.
- When you start a new document, be sure the final size of the document includes bleed dimensions
- 1/16″ (.0625 of an inch) will be trimmed off each side of your product (example: a Standard Postcard 4.375″ x 6.125″ will trim to 4.25″ x 6″).
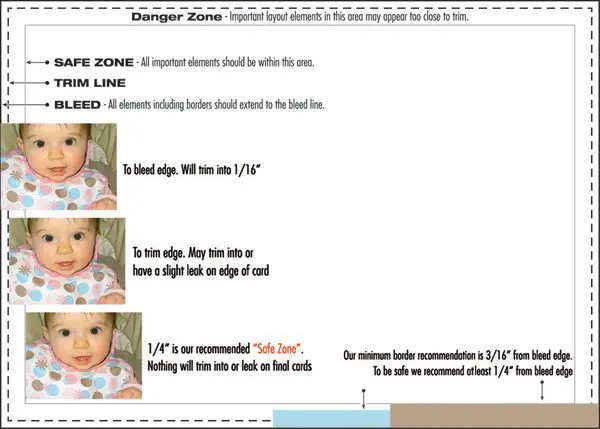
Step 2 – Bleed Edge, Trim Edge & Safe Zone
- Download Template: InDesign templates are available with guidelines for bleed, trim and safe zone.
- Borders should be .25″ thick from the bleed edge (3/16″ or .1875″ from trim). 3/16″ is minimum border recommended.
- 1/16″ (.0625 of an inch) will be trimmed off each side of your product (example: a Standard Postcard 4.375″ x 6.125″ will trim to 4.25″ x 6″).
Caution:
- Elements too close to or over the trim edge may trim into or leave a visible leak.
- Borders thinner than 3/16″ from bleed edge may appear uneven when trimmed.
- Images bordering the trim edge may cause a leak on final cards. Images should “bleed” off the page.
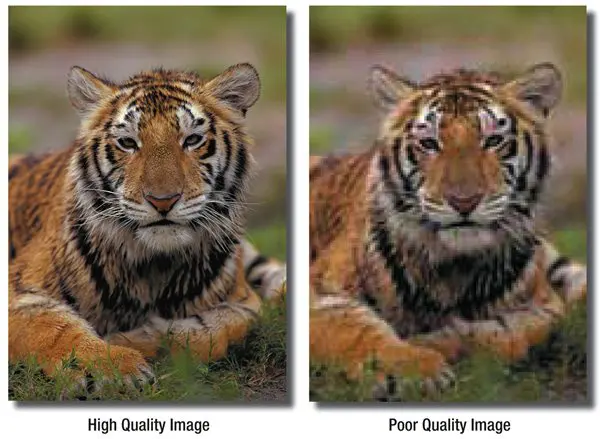
Step 3 – Image Quality & Resolution
Good image quality and color makes a big difference when your order is printed.
- All images should be converted to CMYK, Color Managed and edited in an image editing program like Photoshop.
- See Photoshop Instructions on our website for more details.
- Any colors in RGB or designated spot colors (Pantone color swatches) will need to be converted to CMYK.
Caution:
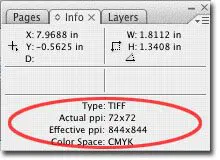
- We recommend 355 PPI for all images and 1200 PPI for all bitmap images.
- To view image information in InDesign view your info palette (Go to Window -> Info)
- Scaling images up decreases resolution (less pixels per inch), while scaling images down increases resolution. Be sure the resolution is still at least 355 PPI once enlarged to fit postcard dimensions. See “Effective PPI” for resolution at current image size.


To prevent poor quality images your file(s) should meet some basic standards of quality and color:
-
-
- Resolution:
355 PPI (pixels per inch)
1,200 PPI for bitmap (B/W) TIFFs - Image Quality:
JPEG Compression
Digital Cameras - Frontside Color: CMYK
Also see our Monitor Calibration and Printing Profiles - Backside Color: CMYK (4/4), Grayscale or B/W (4/1)
- Resolution:
-
Additional Color Options:
-
- Send us a Color Sample that resembles your color expectations and we will do a color review/comparison.
- You can order a Color Proof $55 (adds one day)
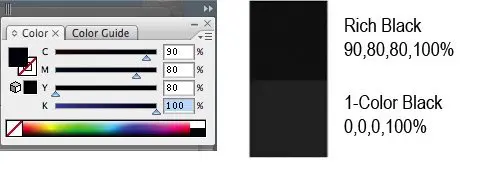
Step 4 – “Rich” Black Values
In order for color-side black borders, headlines, and text to appear dark and saturated (“rich”), set your CMYK (Cyan, Magenta, Yellow, and Black) values accordingly:
C = 90%
M = 80%
Y = 80%
K = 100%
Caution: Black values that appear the same onscreen may actually be vastly different when printed:
Step 5 – Image Management
When submitting an InDesign layout, we require all support files (including linked images and fonts) to be submitted along with the layout file. If you are supplying a pdf, the support files are not needed, but images must be properly linked to your file before the pdf can be exported.
-
-
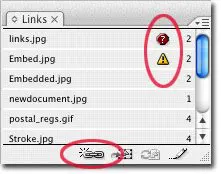
- Use the links palette to view linked or embedded images (Go to Window -> Links)
- Make sure all images are currently linked or embedded.
-
Relinking Images
-
- Missing links will have a red icon next to the name.
- Modified links will have a yellow warning icon.
- To relink an image, double click on the image you want to relink or select the image and click on the chain icon. This will bring up a dialogue box where you can navigate to the new image.

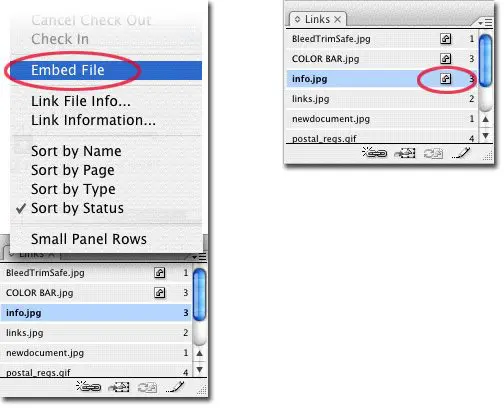
Embedding Images
-
- To embed an image, go to the fly-out menu in the Links palette.
- Select “Embed File.” An icon will appear next to the file name.

Step 6 – Thin Hairlines
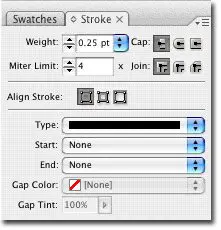
Hairlines thinner than .25 points may not show up when printed.
-
- To check a line thickness select the keyline or stroke and go to Window -> Stroke.
- Be sure to set the line width to .25 points or higher:

Step 7 – Fonts
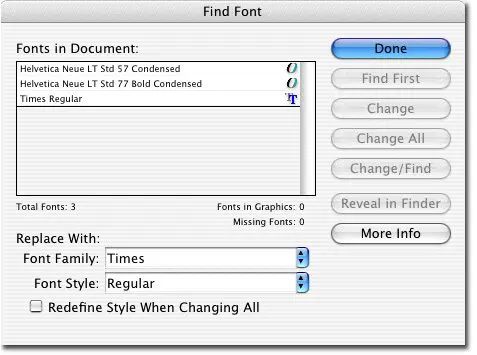
To see which fonts are being used in your InDesign file go to Type -> Find Font.
-
- Be sure that you DO NOT use Multiple Master Fonts (“MM” in filename – example: “OceanSanMM”).
- From here you can replace any of the fonts used in your layout by selecting a new font from the drop down menu.
- To create outlines of the text: select the text box in your layout, Go to Type -> Create Outlines. Once this is done the text will not be editable, fonts do not need to be submitted if this is done.

Step 8 – U.S. Postal Regulations
If you plan on mailing your postcards (or having us mail them for you), your layout must meet U.S. Postal Regulations. Please remove any template information before submitting your layouts or exporting your pdfs.