Postcard Retargeting
Tag Placement Instructions
Follow these instructions to add the Modern iO tag to your website
Select your website’s platform to begin.
Adding Modern iO code to WordPress
The tracking code for Modern iO must be placed in the <head> section of your website. In WordPress, there are multiple ways to accomplish this. Here are the methods we found to work the best.
Method 1: Adding code through your WordPress Theme
Every WordPress theme is different. It is the overall design of your website, and each one has its own set of options and customizations. Many times the Theme Options will include an area to add code to the <head> section of your website. Check to see if this is available on your website. You may need to refer to your Theme’s documentation to find out if this is available.
Method 2: Use a Plugin
A plugin is a simple way to add the Modern iO code to your website. It should work whether or not your theme has the option to add <head> code in.
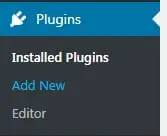
- Once signed into your WordPress website, go to Plugins and click Add New.

- We Recommend Using the plugin Head, Footer and Post Injections by Stefano Lissa.
Modern iO has no affiliation with this plugin or author. If you have another plugin already that you would prefer to use, that should be okay, as there are many alternatives.
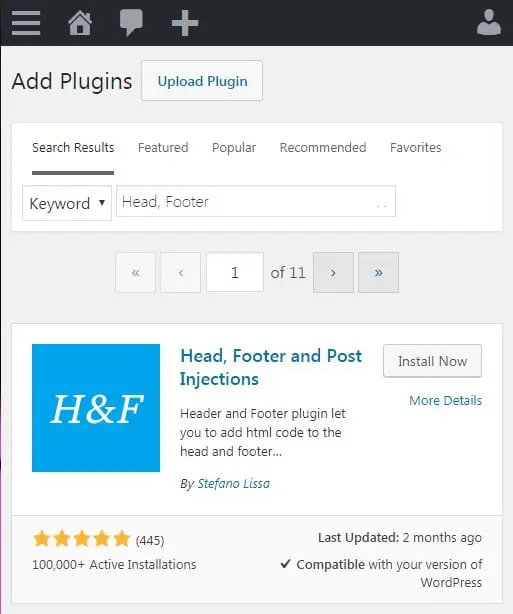
We have found this one easy to use and it works well. - Use the search terms “Head, Footer” and press Enter/Return on your keyboard to search.

- Click Install Now to the plugin called “Head, Footer and Post Injections”
- Go to Plugins and Activate your newly installed plugin.

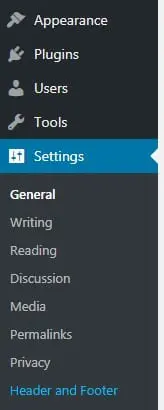
- Go to Settings and click Header and Footer

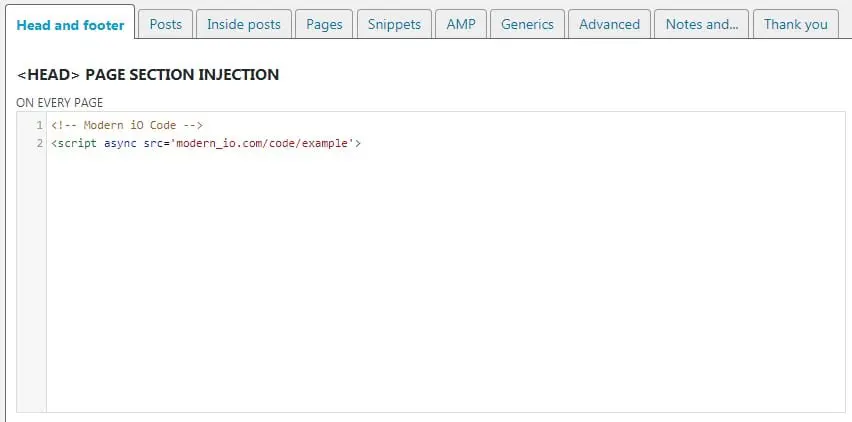
- In the first tab named Head and footer, insert your code into the first text box.
This will add the Modern iO code to every page of your website.
- Scroll to the bottom of the page and click Save.

- That’s it! Modern iO will start identifying your visitors to create leads and opportunities from your web traffic.


Adding Modern iO code to WIX
The tracking code for Modern iO must be placed in the <head> section of your website. Your WIX powered website has this option built in.
- Once signed into your WIX website, go to the Dashboard.

- Click the Site Actions button for the website you want to add the code to. Then click Edit Site.

- From the top menu, click Settings and then Tracking & Analytics.

- Click </> Custom. The same link is listed in two locations.

- Add the Modern iO code into the area provided. Click Apply.

- Verify that the code has been added and is turned on.

- That’s it! Modern iO will start identifying your visitors to create leads and opportunities from your web traffic.


Adding Modern iO code to SquareSpace
The tracking code for Modern iO must be placed in the <head> section of your website. In SquareSpace, this feature is available in all Business and Commercial plans as well as Legacy Personal Plans (no longer available to new subscribers). Code cannot be added to new Personal Plans.
Once you get the tracking code from Modern iO, log into your SquareSpace account.
- Click the Home Menu
- Navigate to Settings, click Advanced and then click Code Injection

- Paste your Modern iO code into the Header

- Click Save.
- That’s it!
Modern iO will start identifying your visitors to create leads and opportunities from your web traffic.


Adding Modern iO code to Shopify
Custom Plugin / Application
Shopify offers a custom App that makes adding code to the <head> section of your site a breeze. This is what the majority of our Shopify customers use and is the preferred method.
This app was not created by, nor are they affiliated with us.
Once you add the App to your store, you can paste in the Modern iO Tag and begin retargeting website visitors with Direct Mail!
Step 1: Add App to Shopify by pressing the Install button while logged into your account.
https://apps.shopify.com/insert-code-to-header-and-footer

Step 2: Install the app. It requires basic theme permissions.

Step 3: Click the button to Add New Code.
This plugin allows you to add multiple, separate codes, but we only need one.

Step 4: Create a title for the tag, this can be anything but we typically use “Modern Postcard Tag”. From the dropdown menu, select to “Add this code to” – “Entire Store”. Although you can select “Custom”, which will only display the tag on specific pages you select. Enter the unique tag supplied by your Account Manager, and press the Save button.

Step 5:That is it! Although we recommend checking your Theme Customizer and App Settings to make sure that the tag and plugin are enabled.

The Header section should be toggled on.

In your Admin section, double check the sidebar for Apps, and that the plugin and tag are both enabled.

That’s it! Please reach out if you have any questions on installing the Tag in Shopify.
Add Conversion Tag to Shopify
To add your tag to the Checkout, Order Status and Thank You page, follow these instructions:
1. Settings >
2. Checkout & Accounts >
3. Order Status Page >
4. Paste your code into the Additional Scripts. Same code used in the Insert Code plugin.
5. Save


Adding Modern iO code to Magento
A single line of code must be added to your website before we can re-target visitors. This code is placed in the <head> section of your website. The Magento eCommerce platform has a built in method to add this code, which only takes a couple of minutes. Note: This requires you to be on the Magento 2 platform. Magento 1 requires a theme edit.
Once we send you your unique Modern iO code, log into your Magento account.
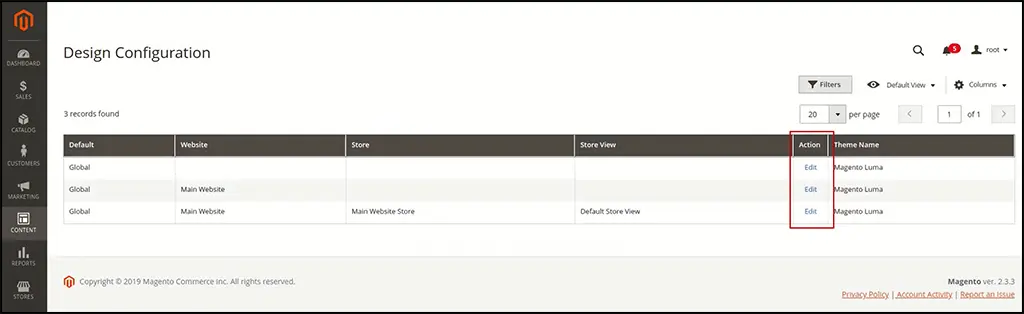
Navigate to the Admin Panel, then select Content > Configuration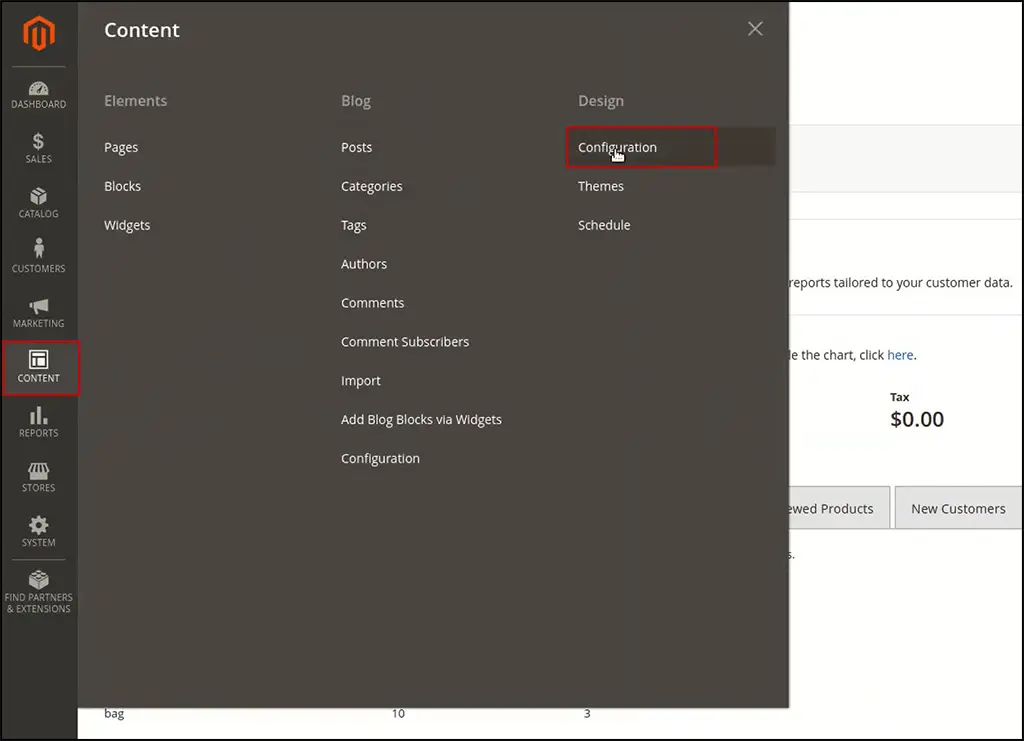
This will list your Store Views.
Depending on your configuration, you may have to edit one or several stores.
Select Edit on Store View(s) you want to place code on.
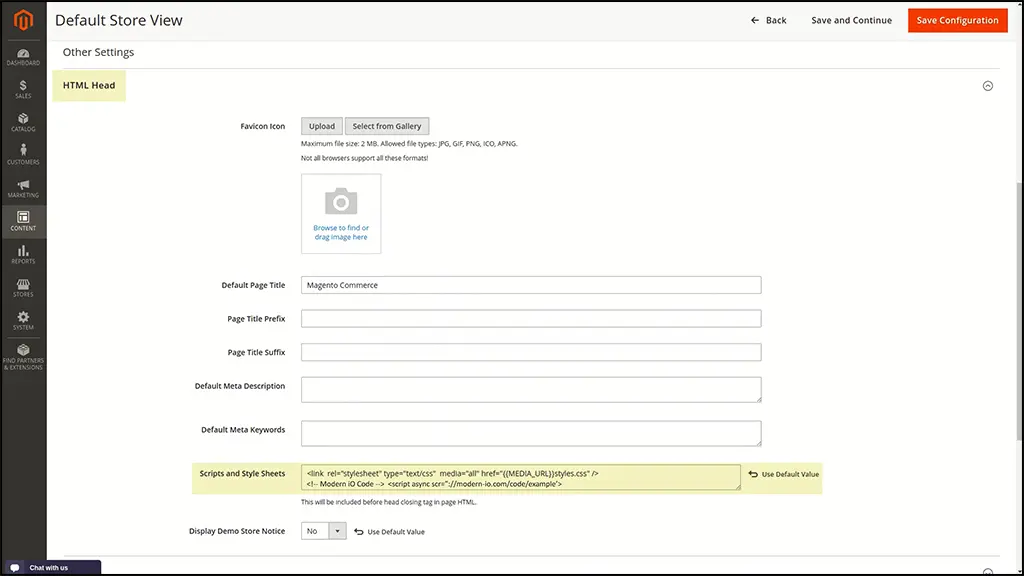
In each Store View, expand the section HTML Head, and locate the section Scripts and Style Sheets.
Paste in the Modern iO code after any code that may already be present.
Save Configuration
It’s now recommended to flush your cache to make sure the code shows up.
Go to the Admin Panel
Then select System > Cache Management (under the Tools sub heading)
Press the orange Flush Magento Cache button.
That’s it! Let us know this has been added and we will verify that your Magento site is now ready to re-target visitors.
Adding Modern iO code to InstaPage
The tag for Modern iO must be integrated into your website before it can start collecting data. The Instapage platform makes this fairly easy and has a built in area for adding the tracking code.
Once you get the tracking code from Modern iO, log on to your InstaPage account.
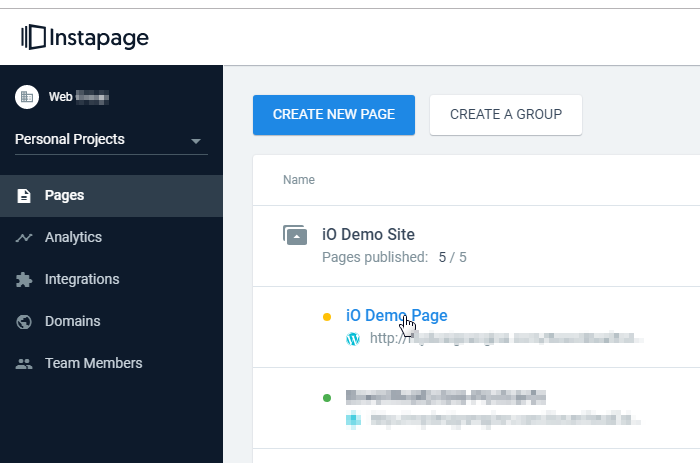
- From the Dashboard, select Pages
- Open up the page you want to add the tag too. If you want this on multiple pages, you will have to repeat these steps for each page.

- Once the page is open, select “Scripts & GDPR” from the left navigation

- Add your unique Modern iO Tracking code to the FOOTER section and hit SAVE and then UPDATE.

- That’s it!
Modern iO will start identifying your visitors to create leads and opportunities from your web traffic.


Adding Modern iO code to Google Tag Manager
Login: to Google Tag Manager, or set up an account if needed.
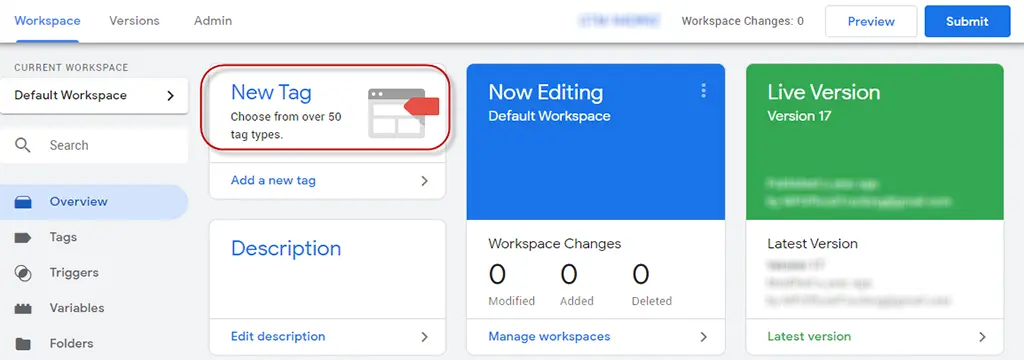
Overview Section: go to overview on the left hand side bar.
New Tag: click on the section that says “New Tag”.
Untitled Tag: you’ll see a section to set up your tag called “Untitled Tag”
Tag Configuration: click in this area.
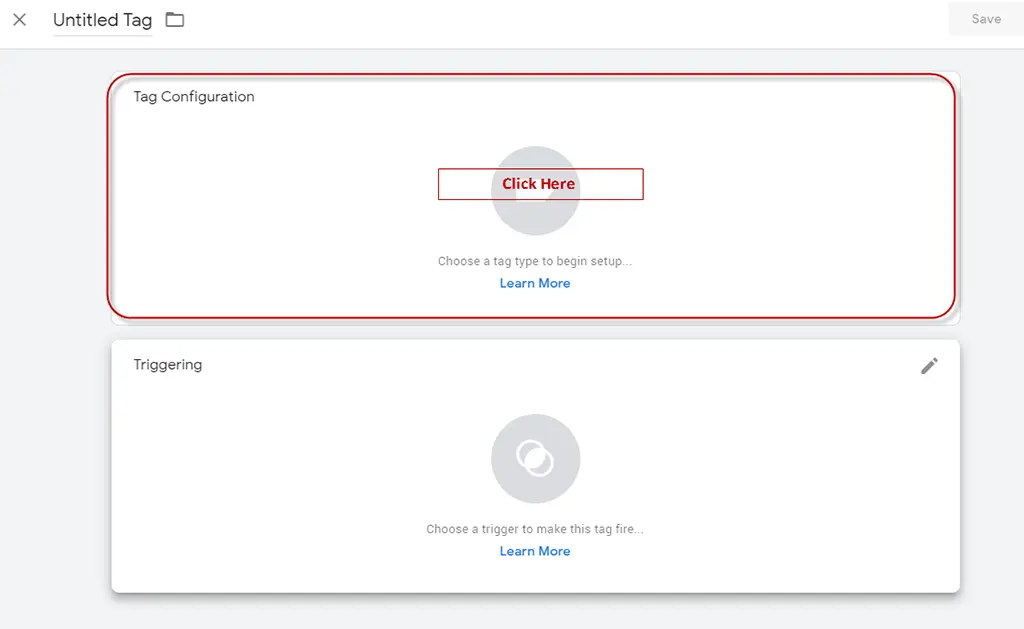
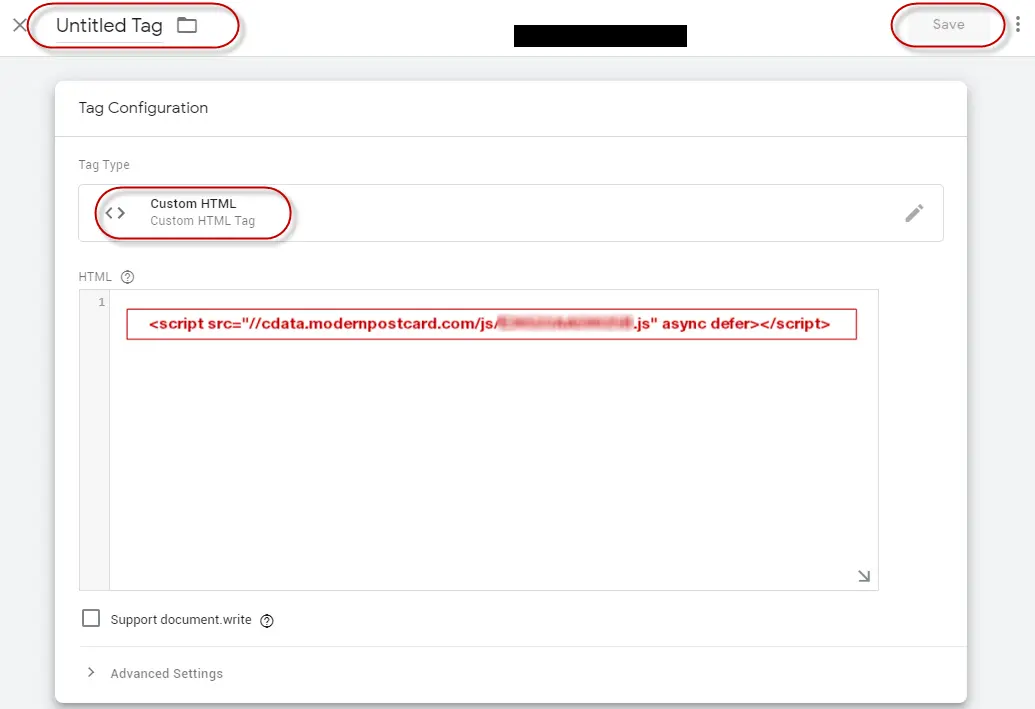
Choose Tag Type: choose Custom HTML for the tag type.

Untitled Tag: see “Tag Configuration” window, Copy & Paste the Modern iO tag code exactly as received and SAVE your work.
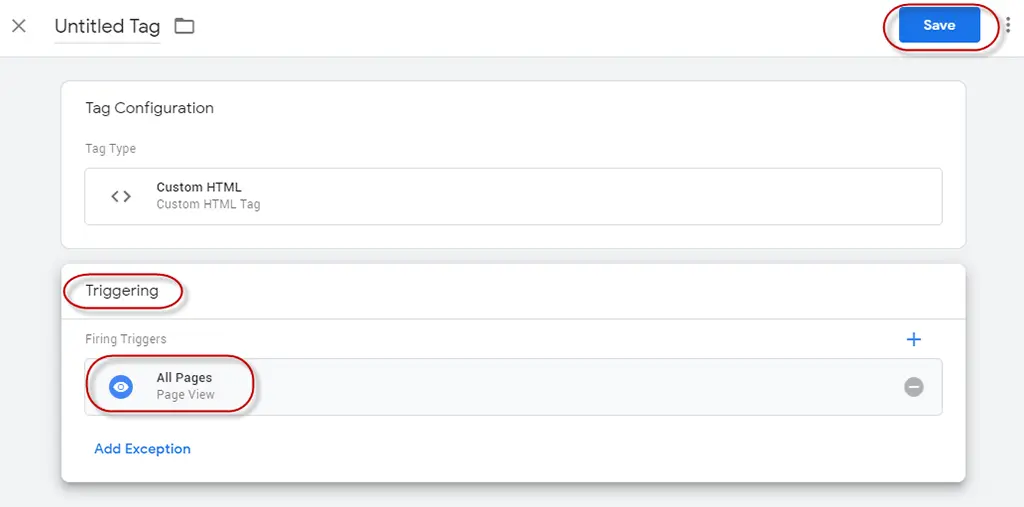
Triggering: choose “All Pages” for the trigger. We recommend choosing all pages so that we can report the data per page for strategic reasons. We will set up the campaign and the urls that will receive cards programmatically, be sure to SAVE your work.
Submit Your Tag: be sure to click the SUBMIT button, and that will take you to another screen; you’re not done yet.
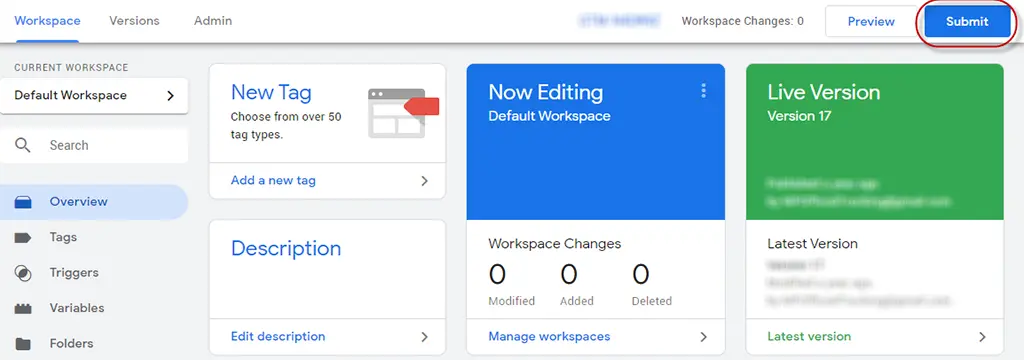
Publish the Tag: click on PUBLISH, this is a simple but often missed step in the process; you won’t collect data until it’s published.

Adding Modern iO code to BigCommerce
The BigCommerce website platform has a Script Manager that allows you to add the Modern iO website tag.
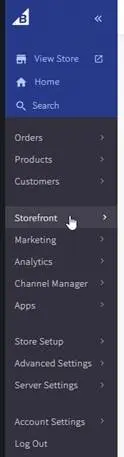
- Log in and navigate to the Storefront

- Go to the “Script Manager”

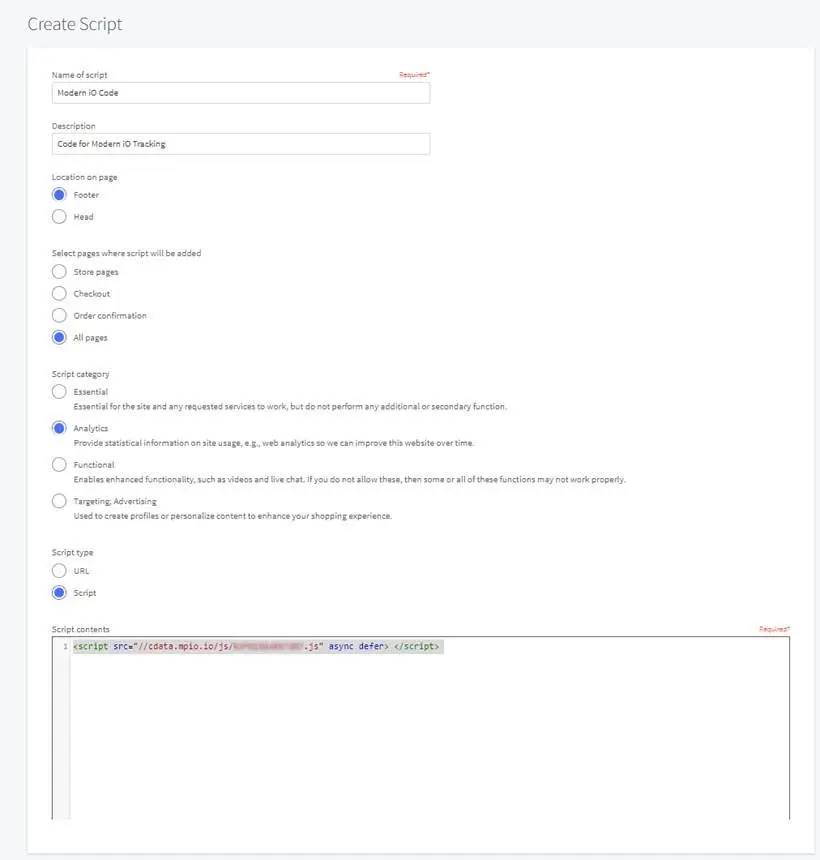
- Create a new script using the following settings:
Location on page: Footer
Script category: Analytics
Script type: URL
The actual script is unique to you and will be emailed upon setup.
SAVE
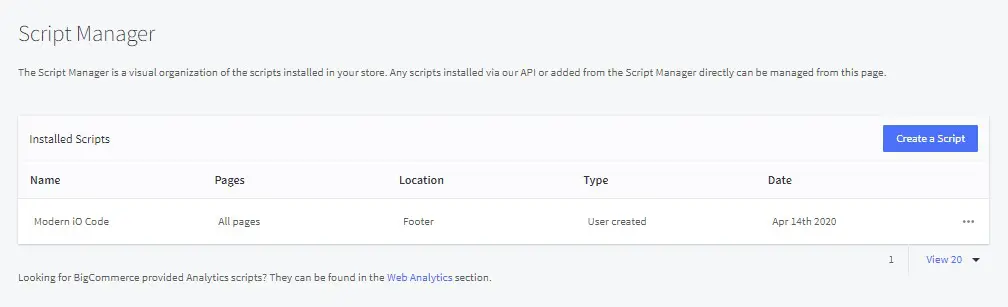
- That’s it. The Script Manager should now show the active script. It can be edited or deleted at any time.